
I am going to be totally upfront about this one. This is probably the most complicated cupcake recipe I have ever completed. Needlessly complicated? Perhaps, but having no official culinary training I have no basis to make that call. However, knew the minute I saw this I had to make it. Just so you know, when I made this recipe they turned out fairly dense (for those of you that are picky about this sort of thing). I’ve tried to include as many pictures/guidelines as possible, and I’ll reference the following notes in the recipe below as needed.

Vanilla bean vs vanilla extract. Here’s the deal, I vote vanilla bean for the following reasons;
a) It’s not hard to find, I got these at Costco for heaven’s sake!
b) In white icing, it doesn’t change the colour to off-white like vanilla extract, and you can see the cool little vanilla beans throughout which makes it look yummier.
c) I feel all fancy-like when I use it.
Could you use vanilla extract instead? Of course you can. How much? HA like you actually measure it out even when they give you a measurement. Eyeball it like you always do, you classy chef you.

The following pictures have references to specific steps in the recipe.

*Step 4 – stiff peaks. Don’t worry; I wouldn’t have paid attention to this picture either until I hit this step.

*Step 5 – I’m still not sure what recipes mean when they say that it should look “fluffy”. Cotton candy looks fluffy. I can’t think of any other food that I would describe in this way. In any case, this is what step 5 was for me.

*Step 12 – cut an “x” into your cupcake that is slightly wider than the diameter of your truffle. Math terms for the win.

*Step 12 – A chocolate truffle INSIDE the cupcake. YUM.

*Step 16 – Yes, there are so many steps in this recipe, but it’s only because I’d rather break it into lots of little pieces than have 4 steps with 10 mini-tasks to do in each one. Technically it’s 19 steps in all. WAIT STOP DON’T LEAVE I PROMISE IT’S GREAT! Anyways this is the consistency your icing should be. It’s thicker than buttercream but still pretty light all things considered. You might also consider eating this with a spoon for breakfast the next morning…uhh…I mean…I didn’t do that….
It’s so good and totally worth the work. You’ll want to celebrate at your intrepid culinary abilities after this one.

Ingredients
Cupcakes
1 3/4 cups cake flour (supposedly you should NOT use all-purpose for this one. I didn’t want to risk evoking the wrath of the baking gods so I listened and bought an entire bag of cake flour for this recipe).
2 tsp baking powder
2/3 cup milk (skim was fine, you could for sure use a higher percentage if you wanted)
1/2 a vanilla bean
4 egg whites, room temperature
6 tbsp butter, softened
1/2 cup granulated sugar
1/4 cup sour cream
12 round white chocolate truffles, like Lindor (the original recipe says “unwrapped” here…you know, to remind you not to bake the chocolate with the tinfoil wrapper still on it **rolls eyes**)
Frosting & Garnish
7 oz white chocolate for baking
1pkg (250 g) cream cheese, softened
1/4 cup butter (1/2 stick), softened
1/2 vanilla bean
2 cups powdered sugar
Directions
1. Preheat oven to 325°. Place 12 paper liners in the wells of a muffin pan. Take out your eggs to reach room temperature, and butter and cream cheese to soften.
2. Whisk flour and baking powder in a small bowl.
3. Cut open vanilla bean and scrape out the seeds. Combine milk and vanilla in a small cup and mix.
4. In a medium mixing bowl, beat egg whites on high speed of electric mixer until stiff peaks form (*stiff peaks? See note above)
5. In a large mixing bowl (yes, you have 3 bowls, a cup, and a muffin tin out now) beat butter and granulated sugar on medium-high speed until fluffy, (*fluffy? See above).
6. Beat sour cream into the large bowl with the “fluffy” mixture until smooth (smooth? Sorry no picture for this one…smooth=well combined and uniform).
7. On medium speed, add flour mixture (the small bowl from step 2) in three additions, alternating with milk mixture (in the cup from step 3) in two additions, mixing until smooth. (Don’t get it? Split the flour bowl into 3 parts. Add one of those parts. Mix. Now add half the milk. Mix. Now add another part of the flour. Mix. Now add the rest of the milk. Mix. Now add the rest of the flour. Mix.)
8. Whisk in one-third of the egg whites. Fold in (gently incorporate) the remaining egg whites using the whisk.
9. Divide batter evenly among the cupcake liners.
10. Bake 17-20 minutes or until toothpick inserted in centers comes out clean.
11. Meanwhile, get your cooling rack, kitchen scissors, and truffles ready to go by your stove.
12. Remove pan from oven to a cooling rack. Immediately snip a 1/2-inch-deep “x” into top of each cupcake using scissors (*huh? See above). Press one truffle into each cupcake until flush with top of cupcake. (*HUH? The pictures will guide you).
13. Remove cupcakes from pan (carefully, because the chocolates will have started melting and will drip out if you’re not careful). Cool 30 minutes or to room temperature.
14. Meanwhile, start the frosting. Place 6 oz (out of the listed 7 oz) white chocolate in the bowl of a double boiler, and melt while stirring continuously. Remove from heat and let chocolate stand until it is slightly cooled.
15. In (yet another) large mixing bowl, add melted chocolate, cream cheese, butter and scraped out seeds from the vanilla bean. Using clean beaters, beat on medium speed until evenly mixed.
16. Slowly add powdered sugar and beat well (*picture of icing consistency above).
17. Place frosting in a piping bag with open star tip. Pipe frosting evenly around tops of cupcakes. Sense my envy as you get to do this, while I had to attempt to do the same thing with a mediocre cookie press.
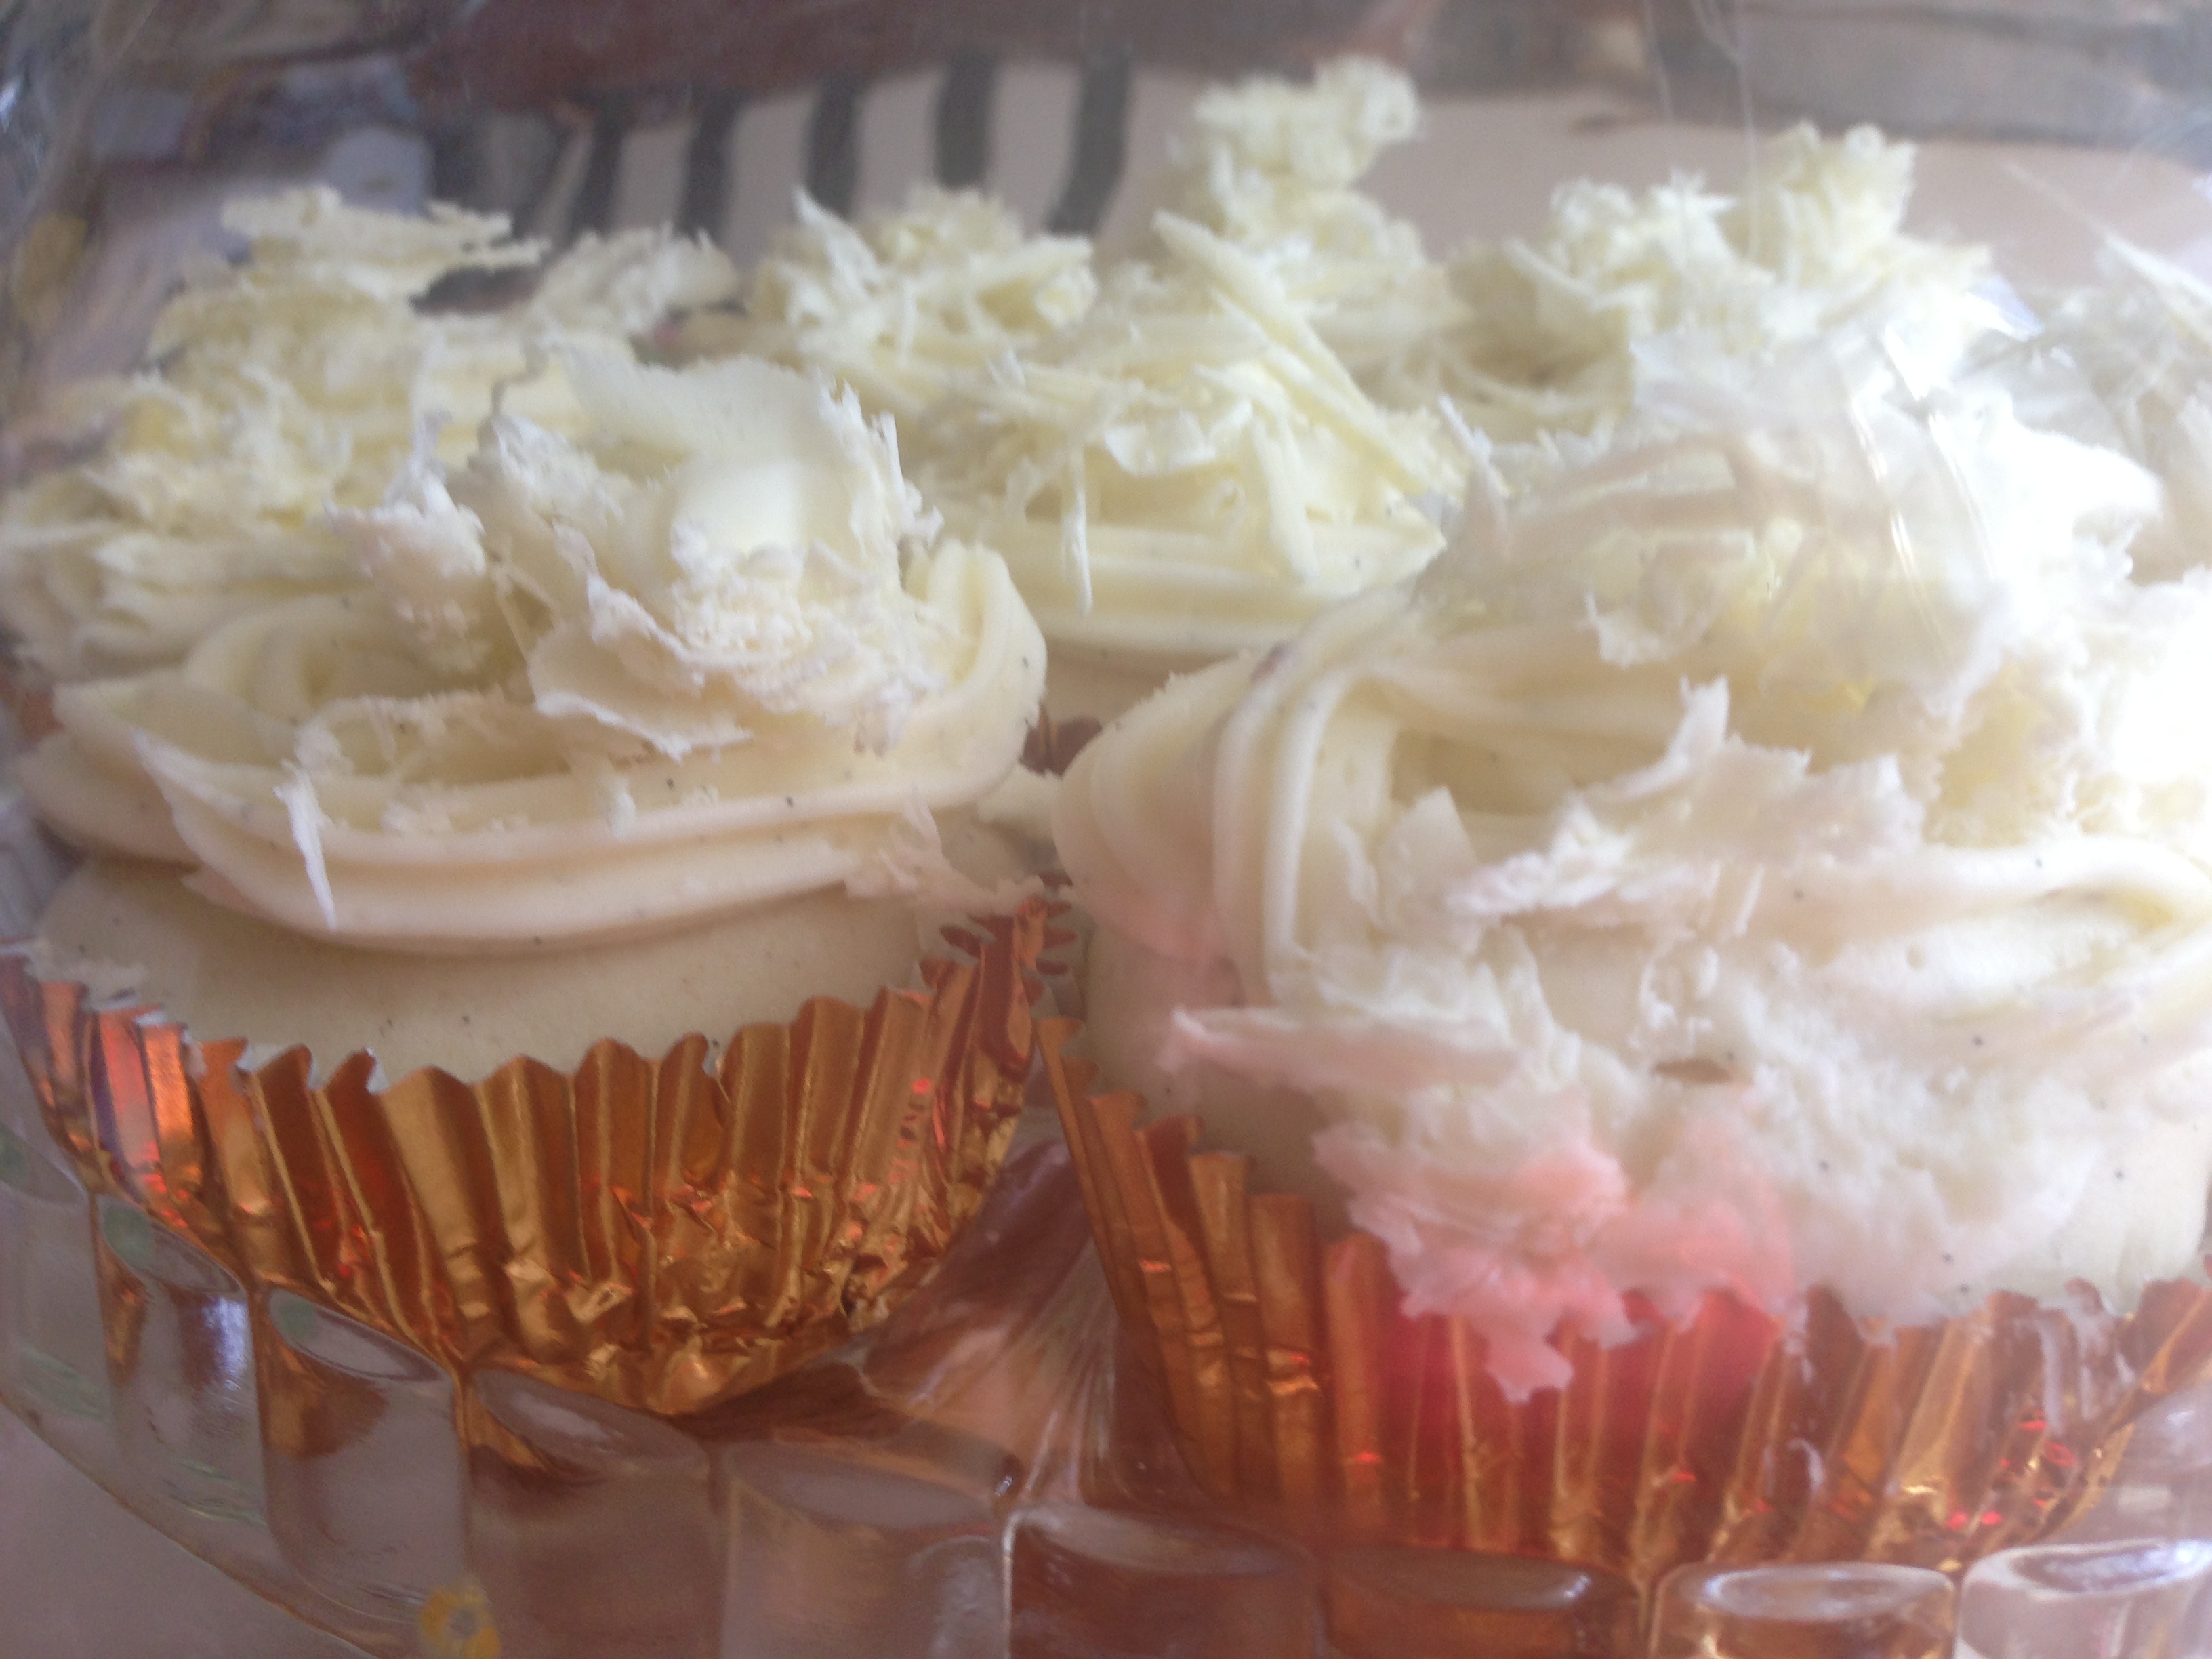
18. With the remaining 1 ounce of white chocolate, use a vegetable peeler or mandolin to create curls. You may need to soften the chocolate for a few seconds in the microwave before you do this.
19. FINALLY top cupcakes with chocolate curls.
BOOM!!! Done. So worth it.
